How to use ucat and ucat_sps
ucat and ucat_sps generates a catalog of galaxies using the ivy workflow
engine. We are describing here how to use ucat and ucat_sps without the
galsbi interface which enables the user to generate a galaxy catalog
with maximum flexibility.
Running plugins directly
The most straightforward way to create a galaxy catalog is by running
the corresponding ucat or ucat_sps plugin directly. First, we need to build the
context of the simulation. We load the default values from either the
galsbi.ucat.config.common or galsbi.ucat_sps.config.common_sps module and assign the correct file paths to
others.
import ivy
import os
from cosmo_torrent import data_path

ctx = ivy.context.create_ctx(
    parameters=ivy.load_configs("galsbi.ucat.config.common")
)

# integrations tables, templates, filters and extinction files
ctx.parameters.template_file_name = os.path.join(data_path("template_BlantonRoweis07"), "template_spectra_BlantonRoweis07.h5")
ctx.parameters.filters_file_name = os.path.join(
    data_path("HSC_tables"), "HSC_filters_collection_yfix.h5"
)
ctx.parameters.templates_file_name = os.path.join(
    data_path("template_BlantonRoweis07"), "template_spectra_BlantonRoweis07.h5"
)
ctx.parameters.extinction_map_file_name = os.path.join(
    data_path("lambda_sfd_ebv"), "lambda_sfd_ebv.fits"
)
ctx.parameters.templates_int_tables_file_name = os.path.join(
    data_path("HSC_tables"), "HSC_template_integrals_yfix.h5"
)
from galsbi.ucat.plugins import sample_galaxies

plugin = sample_galaxies.Plugin(ctx)
plugin()
A similar example can be run for ucat_sps where we load a different context
ctx = ivy.context.create_ctx(
    parameters=ivy.load_configs("galsbi.ucat_sps.config.common_sps")
)
ctx.parameters.filters_file_name = os.path.join(
    data_path("HSC_tables"), "HSC_filters_collection_yfix.h5"
)
ctx.parameters.extinction_map_file_name = os.path.join(
    data_path("lambda_sfd_ebv"), "lambda_sfd_ebv.fits"
)
ctx.parameters.ssp_library_filepath = os.path.join(
    data_path("GalSBI_SPS_res"), "PG_Ch_Mi_C3K.fits"
)
ctx.parameters.ProMage_model_filepath = os.path.join(
    data_path("GalSBI_SPS_res"), "ProMage_GalSBI_SPS_HSC_mags.pt"
)
ctx.parameters.ProMage_property_scaler_filepath = os.path.join(
    data_path("GalSBI_SPS_res"), "ProMage_GalSBI_SPS_HSC_mags_property_scaler.pkl"
)
ctx.parameters.ProMage_magnitude_scaler_filepath = os.path.join(
    data_path("GalSBI_SPS_res"), "ProMage_GalSBI_SPS_HSC_mags_magnitude_scaler.pkl"
)
ctx.parameters.surviv_stellar_mass_emulator_model = os.path.join(
    data_path("GalSBI_SPS_res"), "surv_sm_emulator.pt"
)
ctx.parameters.surviv_stellar_mass_emulator_property_scaler = os.path.join(
    data_path("GalSBI_SPS_res"), "ssm_scaler_surv_sm_emulator.pkl"
)
ctx.parameters.surviv_stellar_mass_emulator_ssm_scaler = os.path.join(
    data_path("GalSBI_SPS_res"), "ssm_scaler_surv_sm_emulator.pkl"
)
ctx.parameters.sed_generator = "emulator"
and we run a different plugin
from galsbi.ucat_sps.plugins import sample_galaxies_sps

plugin = sample_galaxies_sps.Plugin(ctx)
plugin()
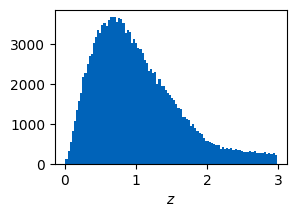
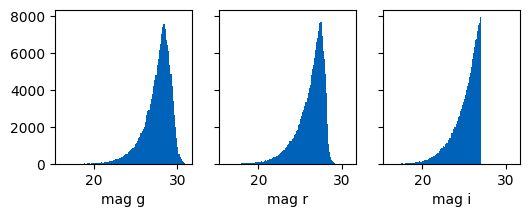
The context contains now a galaxy catalog with parameters such as redshift or apparent magnitudes for different bands. Note that the hard cut in the i-band magnitude in the phenomenological model comes from the fact that a cut in the i-band is performed when sampling. Such a cut is not performed in the stellar population synthesis version.
import matplotlib.pyplot as plt
from cosmic_toolbox.colors import set_cycle
set_cycle()

plt.figure(figsize=(3,2))
plt.hist(ctx.galaxies.z, bins=100)
plt.xlabel("$z$")
plt.show()

fig, axs = plt.subplots(1,3, figsize=(6,2), sharex=True, sharey=True)
axs[0].hist(ctx.galaxies.int_magnitude_dict["g"], bins=100)
axs[0].set_xlabel("mag g")
axs[1].hist(ctx.galaxies.int_magnitude_dict["r"], bins=100)
axs[1].set_xlabel("mag r")
axs[2].hist(ctx.galaxies.int_magnitude_dict["i"], bins=100)
axs[2].set_xlabel("mag i");
Running from config files
Basic example
Especially if the pipelines become more complex, it might be easier to generate a config file and run this config file. The script from above would look like this if you setup a config file:
import os
import galsbi.ucat.config.common
from cosmo_torrent import data_path

# Import all common settings from ucat and ufig
for name in [name for name in dir(galsbi.ucat.config.common) if not name.startswith("__")]:
    globals()[name] = getattr(galsbi.ucat.config.common, name)

plugins = ["galsbi.ucat.plugins.sample_galaxies"]
filters_file_name = os.path.join(
    data_path("HSC_tables"), "HSC_filters_collection_yfix.h5"
)
 templates_file_name = os.path.join(
     data_path("template_BlantonRoweis07"), "template_spectra_BlantonRoweis07.h5"
 )
 extinction_map_file_name = os.path.join(
     data_path("lambda_sfd_ebv"), "lambda_sfd_ebv.fits"
 )
 templates_int_tables_file_name = os.path.join(
     data_path("HSC_tables"), "HSC_template_integrals_yfix.h5"
 )
Running this config file is then done by using ivy.execute command.
The resulting galaxy distribution is the same as above.
ctx = ivy.execute("basic_example_config")

plt.figure(figsize=(3,2))
plt.hist(ctx.galaxies.z, bins=100)
plt.xlabel("$z$")
plt.show()

fig, axs = plt.subplots(1,3, figsize=(6,2), sharex=True, sharey=True)
axs[0].hist(ctx.galaxies.int_magnitude_dict["g"], bins=100)
axs[0].set_xlabel("mag g")
axs[1].hist(ctx.galaxies.int_magnitude_dict["r"], bins=100)
axs[1].set_xlabel("mag r")
axs[2].hist(ctx.galaxies.int_magnitude_dict["i"], bins=100)
axs[2].set_xlabel("mag i");


Complex example
You can combine different plugins by adapting the config file. This example samples galaxies based on the default values, applies shear to them and saves the catalogs for all bands.
import os
import galsbi.ucat.config.common
from cosmo_torrent import data_path

# Import all common settings from ucat and ufig
for name in [name for name in dir(galsbi.ucat.config.common) if not name.startswith("__")]:
    globals()[name] = getattr(galsbi.ucat.config.common, name)

plugins = [
    "galsbi.ucat.plugins.sample_galaxies",
    "galsbi.ucat.plugins.apply_shear",
    "galsbi.ucat.plugins.write_catalog_photo",
    "galsbi.ucat.plugins.write_catalog",
    "ivy.plugin.show_stats"
]

filters_file_name = os.path.join(
    data_path("HSC_tables"), "HSC_filters_collection_yfix.h5"
)
templates_file_name = os.path.join(
    data_path("template_BlantonRoweis07"), "template_spectra_BlantonRoweis07.h5"
)
extinction_map_file_name = os.path.join(
    data_path("lambda_sfd_ebv"), "lambda_sfd_ebv.fits"
)
templates_int_tables_file_name = os.path.join(
    data_path("HSC_tables"), "HSC_template_integrals_yfix.h5"
)

filepath_tile = os.getcwd()
ctx = ivy.execute("complex_example_config")
This creates two catalogs, one with intrinsic properties of the galaxies (e.g. position, shape, size) and one with the photometric properties (magnitudes in different bands)
from cosmic_toolbox import arraytools as at
cat_photo = at.load_hdf_cols("ucat_photo.h5")
print(f"parameters of the photometric catalog: {cat_photo.dtype.names}")
cat_int = at.load_hdf("ucat_galaxies.h5")
print(f"parameters of the intrinsic catalog: {cat_int.dtype.names}")
parameters of the photometric catalog: ('abs_mag_g', 'abs_mag_i', 'abs_mag_r', 'abs_mag_y', 'abs_mag_z', 'galaxy_type', 'int_mag_g', 'int_mag_i', 'int_mag_r', 'int_mag_y', 'int_mag_z', 'mag_g', 'mag_i', 'mag_r', 'mag_y', 'mag_z', 'template_coeffs', 'template_coeffs_abs', 'z')
parameters of the intrinsic catalog: ('id', 'x', 'y', 'z', 'template_coeffs', 'template_coeffs_abs', 'abs_mag_lumfun', 'galaxy_type', 'excess_b_v', 'sersic_n', 'int_r50', 'int_e1', 'int_e2', 'gamma1', 'gamma2', 'kappa', 'e1', 'e2', 'r50')
Adapting ucat to your workflow
The easiest way to adapt ucat or ucat_sps to your workflow is by using a customized
config file. Check out all the different parameters and their
description in galsbi.ucat.config.common or checkout GalSBI: Overview of the galaxy population model.
Similarly, check out the parameters for the stellar population synthesis version in
galsbi.ucat_sps.config.common_sps or GalSBI-SPS: Overview of the galaxy population model.
If you require new features, writing a new plugin is straightforward.
A template plugin is shown below
from ivy.plugin.base_plugin import BasePlugin

class Plugin(BasePlugin):
    def __call__(self):

        # accessing all parameters from the config by calling the context
        par = self.ctx.parameters

        # implement new functionality


    def __str__(self):
        return "new plugin doing something"
If you want to use the generated galaxy catalog to create a simulated image, you can combine your config file with plugins from ufig, for this see the ufig documentation.
To use a galaxy population model that is constrained by data, you can
use the galsbi interface. It is possible to use your custom
config files within the galsbi module but still using the parameters
of one of the galaxy population model, see e.g. Customize configuration.